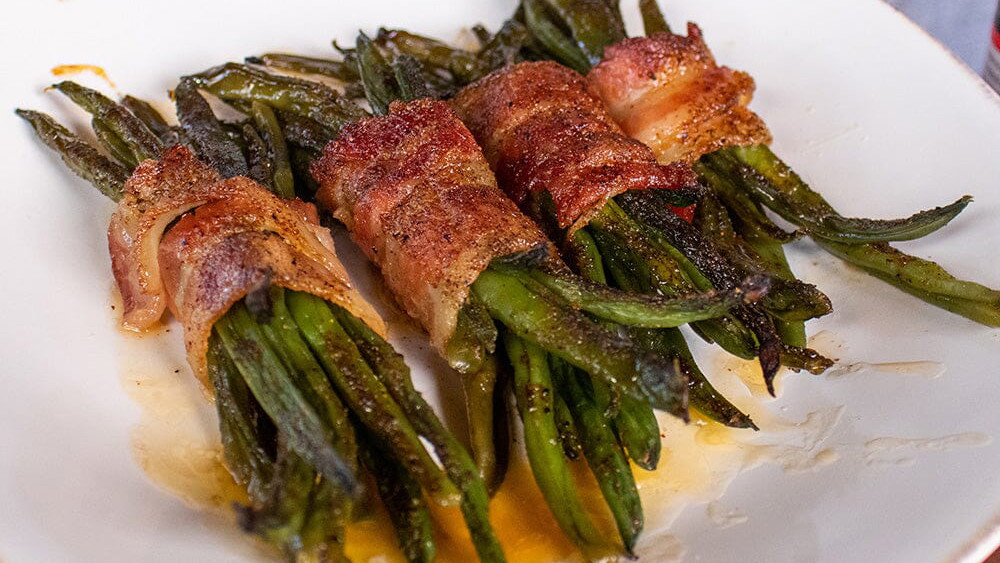
I talk about main course meat dishes a whole lot, because they’re usually the stars of the show. But what about the sides? We all want something tasty that’s not a lot of trouble to enjoy along with the entree. Green beans are a side dish staple. I’m going to dress them up today with some bacon so they’ll be perfect for your next big family meal.
Bacon-Wrapped Green Bean Recipe
There are so many ways to make green beans I can’t even count them. I’ve cooked them dozens of ways, but this recipe is one of my favorites. It's simple with only a few ingredients, and the results are delicious. They go good with beef, pork, or poultry. Let’s get started!
The Ingredients
- French cut green beans. You probably figured this out, because of the name and all.
- Bacon. Using this to wrap the beans adds a delicious savory flavor to every bite.
- Spray oil. This helps the beans not stick to the casserole dish as they cook.
- Butter. I’ll melt it and pour it on the wrapped beans to add flavor and sweetness.
- Brown sugar. A few sprinkles gives the recipe more sweetness and adds taste.
- Low-sodium soy sauce. Packed with flavor, soy sauce adds a tasty element to the dish.
- Heath Riles BBQ Chicken Rub. I should have named this rub “Chicken and so much more” because its herbs and spices mixture makes almost every food taste better.
The Equipment Setup
- Traeger Timberline 1300 preheated to 375 degrees F. I knew this was the way to go with this recipe, as it would cook the bacon and add a bit of smokiness to the flavor.
- Royal Oak Charcoal Hardwood Pellets. I stoked my Traeger with Royal Oak because I love how it burns and the cook it delivers.
The Process for Making My Bacon-Wrapped Green Beans
There’s a detailed demonstration of this recipe in the video and recipe card at the bottom of this post. Here’s a basic run through of how I made this dish.
- Blanch the beans. I put the green beans in a medium-sized pot and let them boil for about 3 minutes, drained the water off, then rinsed them with cold water to stop them from cooking. Blanching helps green beans keep their bright color when they’re cooked.
- Wrap a bean bundle with bacon. Once the beans cooled off a bit, I gathered a small bundle (about 6-8 beans) and wrapped them around the middle with half a piece of uncooked bacon.
- Spray the casserole dish. The wrapped green beans will cook in a casserole dish, so I sprayed it with oil to ensure nothing sticks to it.
- Layer the green beans in the dish, As I wrapped the bundles of beans, I laid them end-to-end in the casserole dish.
- Pour on the butter. Using a small-sized pot, I melted a stick of butter, then poured it over the beans.
- Sprinkle on brown sugar. Brown sugar added another layer of flavor and some sweetness to this green bean recipe. I used my hand and sprinkled it all over the top of the green beans and bacon.
- Drizzle on soy sauce. I opened a bottle of low-sodium soy sauce and drizzled some of it over the green beans to bring in a little saltiness.
- Shake on Chicken Rub. Despite its name, my chicken rub is great on vegetables. I sprinkled a light layer over the green beans to top them off.
- Put them on the grill. The beans were wrapped, seasoned, and ready to go on my Traeger Timberline 1300 to cook. I placed them in the middle of the rack and shut the lid.
- Take them off the grill. After they cooked for about 45 minutes, I checked on them, spun the dish around, and let them go for another 45 minutes. Then they were done and ready to come off the grill. They had a great color and smelled delicious.
The Results
The beans were perfectly cooked and had a rich sweet, savory flavor that blended well with their natural taste. The bacon was a great addition, too. It contributed some more savoriness to the recipe, and added that unique bacon flavor we all love. These bacon-wrapped green beans should be on the menu at your next family gathering. Trust me, you won’t be sorry.
Serving Suggestions
I recommend planning for each person to eat 2-3 bundles of green beans as a side dish.
Storing Bacon-Wrapped Green Beans
Let the beans cool down and store them in an airtight container in the fridge for up to 3 days. You can reheat them in the oven or the microwave.
Equipment and Tools
Traeger Timberline 1300, Royal Oak Charcoal Hardwood Pellets, Medium-sized pot (for blanching), Small-sized pot (for melting the butter), Large Aluminum Sheet Pan , Glass casserole dish.


